
Yarn art is a creative and fun activity that can be enjoyed by people of all ages. Whether you’re a seasoned artist or just starting out, yarn art is a fantastic way to express yourself and add some colorful flair to your home decor. In this step-by-step guide, we’ll take you through the basics of yarn art, from choosing the right materials to creating your own unique designs.
How do I start creating yarn art?
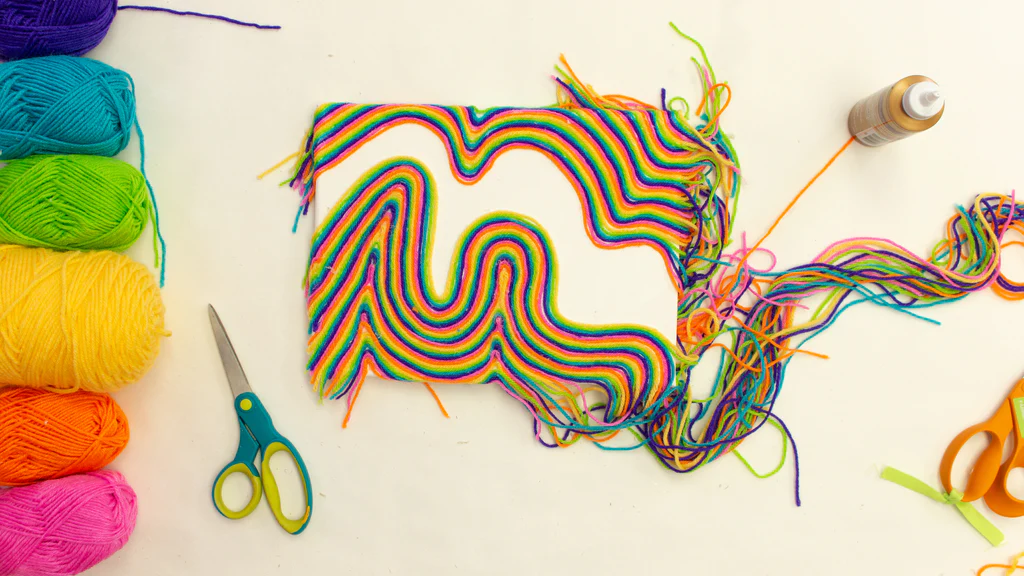
Start by gathering the necessary materials, including yarns, white paper, white glue or hot glue, cotton swabs, scissors, and paper. Then, draw a simple design on the paper and use the glue to stick the yarn over the design. Use different colors and textures to add depth and interest to your design. Don’t be afraid to make mistakes and experiment with different techniques.
Step 1: Materials Needed
Before you start creating your yarn art masterpiece, you’ll need to gather the necessary materials. Here’s a list of what you’ll need:
- Yarns (different colors): The more colors you have, the more options you’ll have for your design.
- White paper: This will serve as the base for your design.
- White glue or hot glue: You can use either one, but white glue is recommended for a cleaner look.
- Cotton swab: This will help you apply the glue to the paper.
- Scissors: These will come in handy for cutting the yarn to the right length.
- Paper: To protect your work surface.
Step 2: Basics of Yarn Art
If you’re new to yarn art, it’s a good idea to start with some basic shapes or patterns. This will help you get a feel for how the yarn works and how to manipulate it to create different designs. Here are some easy shapes to get you started:
- Circle
- Square
- Triangle
- Lens
- Tear Drop
- Paisley
- Zigzag
- Flower
- Waves
Tips for Beginners
- Don’t apply glue over the whole paper at once: Apply glue only on the pattern on which you’ll be sticking yarn and after completing that pattern go for another one.
- Carefully tap the glued yarn on the paper with your finger: This will help flatten it and ensure it sticks properly.
- Glue yarn from the middle or corner of any pattern: This will help you achieve a cleaner look.
- Cut the yarn every time it reaches a corner: This will help you create perfect corners.
- Cut the yarn into small manageable pieces: This is especially useful for filling small blanks or patterns.
Step 3: Creating Your Design
Now that you have the basics down, it’s time to start creating your design. Here are some tips to help you get started:
- Start with a simple design: Begin with a simple shape or pattern and build from there.
- Use a variety of yarns: Experiment with different colors and textures to add depth to your design.
- Don’t be afraid to make mistakes: Yarn art is all about having fun and being creative. If you make a mistake, you can always start again.
Step 4: Adding Yarn to Your Design
Once you have your design drawn out, it’s time to start adding the yarn. Here are some tips to help you do this:
- Use a cotton swab to apply glue: This will help you apply the glue precisely where you need it.
- Stick the yarn over the glue: Make sure to press the yarn firmly onto the glue to ensure it sticks properly.
- Cut the yarn to the right length: Use scissors to cut the yarn to the right length for each section of your design.
Step 5: Filling in the Blanks
As you start to add yarn to your design, you may find that some blank areas need to be filled in. Here are some tips to help you do this:
- Cut the yarn into small pieces: This will help you fill in small areas more easily.
- Use different colors: Experiment with different colors to add more depth to your design.
- Don’t be afraid to get creative: Yarn art is all about being creative and having fun. Don’t be afraid to try new things and see what works best for you.
Step 6: Adding Highlights
Once you have your design mostly complete, it’s time to add some highlights to make it pop. Here are some tips to help you do this:
- Use a contrasting color: Choose a color that contrasts with the main colors of your design to make it stand out.
- Add yarn in small sections: This will help you achieve a more subtle effect.
- Experiment with different textures: Try using different textures of yarn to add more interest to your design.
Step 7: Finishing Touches
Once you have your design complete, it’s time to add some finishing touches. Here are some tips to help you do this:
- Add a border: Use a contrasting color to add a border around your design.
- Use a frame: Consider framing your design to protect it and make it look more professional.
- Display it proudly: Hang your design in a place where you can see it and enjoy it.
Case Study: Yarn Art for Anxiety Relief
In a study published in the Journal of Clinical Art Therapy, researchers found that yarn art significantly reduced anxiety and stress levels in participants. The study involved 20 participants who were taught basic yarn art techniques and asked to create a yarn art piece over 6 weeks. Results showed a significant decrease in anxiety levels, with participants reporting a sense of calm and relaxation during and after the yarn art sessions.
Step-by-Step Instructions
-
Materials Needed:
- Yarns (different colors)
- White paper
- White glue or hot glue
- Cotton swab
- Scissors
- Paper
-
Basic Shapes:
- Circle
- Square
- Triangle
- Lens
- Tear Drop
- Paisley
- Zigzag
- Flower
- Waves
-
Tips for Beginners:
- Don’t apply glue over the whole paper at once.
- Carefully tap the glued yarn on paper with your finger.
- Glue yarn from the middle or corner of any pattern.
- Cut the yarn every time it reaches a corner.
- Cut the yarn into small manageable pieces.
-
Creating Your Design:
- Start with a simple design.
- Use a variety of yarns.
- Don’t be afraid to make mistakes.
-
Adding Yarn to Your Design:
- Use a cotton swab to apply glue.
- Stick the yarn over the glue.
- Cut the yarn to the right length.
-
Filling in the Blanks:
- Cut the yarn into small pieces.
- Use different colors.
- Don’t be afraid to get creative.
-
Adding Highlights:
- Use a contrasting color.
- Add yarn in small sections.
- Experiment with different textures.
-
Finishing Touches:
- Add a border.
- Use a frame.
- Display it proudly.
Results
The final result was a stunning piece of yarn art that showcased the user’s creativity and attention to detail. The use of different colors and textures added depth and interest to the design, making it a true masterpiece.
Conclusion
Yarn art is a fun and creative activity that can be enjoyed by people of all ages. By following these simple steps and tips, you can create your own unique piece of yarn art that you can proudly display in your home. Remember to have fun, be creative, and don’t be afraid to make mistakes.
FAQs
Q: What is the best type of yarn for beginners?
A: Acrylic yarn is a great choice for beginners because it’s soft, lightweight, and easy to work with.
Q: How do I choose the right yarn needle?
A: Choose a yarn needle that is large enough to thread the yarn easily, but not so large that it’s difficult to maneuver.
Q: What is the difference between a yarn needle and a yarn tapestry needle?
A: A yarn needle is a large needle with an eye big enough to thread yarn, while a yarn tapestry needle is a blunt-tipped needle used for weaving in ends and sewing seams.
Q: Can I use yarn art to make functional items?
A: Yes! Yarn art can be used to create functional items like bags, hats, and scarves, as well as decorative items like wall hangings and ornaments.
Q: How long does it take to complete a yarn art project?
A: The time it takes to complete a yarn art project depends on the complexity of the design and the amount of time you can dedicate to working on it. Simple projects can take just a few hours, while more complex projects can take several days or weeks.
Q: Can I sell my yarn art creations?
A: Yes! Many yarn artists sell their creations online or at craft fairs. Make sure to research any local laws or regulations regarding the sale of handmade items.
Q: How do I care for my yarn art creations?
A: To keep your yarn art creations looking their best, avoid exposing them to direct sunlight, moisture, or extreme temperatures. Gently dust or vacuum your yarn art to keep it clean.
Q: Can I use yarn art to make gifts?
A: Yes! Yarn art makes a thoughtful and unique gift for friends and family. Consider personalizing your gift with a special message or the recipient’s name.
Q: Are there any health benefits to yarn art?
A: Yes! Yarn art has been shown to have physical and mental health benefits, including reduced stress and anxiety, improved fine motor skills, and increased cognitive function.
Q: Can I teach yarn art to children?
A: Yes! Yarn art is a great activity for children, teaching them important skills like patience, creativity, and fine motor control. Start with simple projects and gradually introduce more complex techniques as they become more confident.
Q: How do I store my yarn and yarn art supplies?
A: Store your yarn and yarn art supplies in a cool, dry place away from direct sunlight. Use bins, baskets, or containers to keep your supplies organized and easy to access.