
Here is all the details about SOS only on iPhone how to fix it. If you’re reading this, chances are you’ve encountered the frustrating “SOS only” signal on your iPhone. Fear not, because you’re about to dive into a comprehensive guide that will help you troubleshoot and resolve this issue step by step. Whether you’re facing this problem for the first time or it’s been a recurring annoyance, we’ve got you covered with practical solutions.
Understanding the “SOS Only” Issue
Before we jump into the fixes, let’s clarify what “SOS only on iPhone how to fix” means on your iPhone. When your device displays “SOS only” or “Emergency Calls Only,” it typically indicates a problem with your network connection. This can happen due to various reasons such as:
- Network Coverage Issues: Weak or no signal from your carrier.
- SIM Card Problems: Issues with your SIM card or its configuration.
- Software Glitches: Bugs or software updates causing connectivity issues.
Step-by-Step Solutions to Fix “SOS Only” on iPhone
-
Check Network Coverage
The first and most obvious step is to check if your iPhone is within an area with adequate network coverage. Sometimes, simply moving to a different location with better reception can resolve the “sos only on iPhone how to fix” problem.
Action: Move to an open area or near a window to improve signal reception.
-
Restart Your iPhone

A classic troubleshooting step that often works wonders is restarting your iPhone. This can help refresh network settings and clear out any temporary glitches causing the “sos only on iPhone how to fix” issue.
Action: Press and hold the Power button until “Slide to Power Off” appears. After powering off, turn your iPhone back on by pressing the Power button again.
-
Check Airplane Mode and Cellular Settings
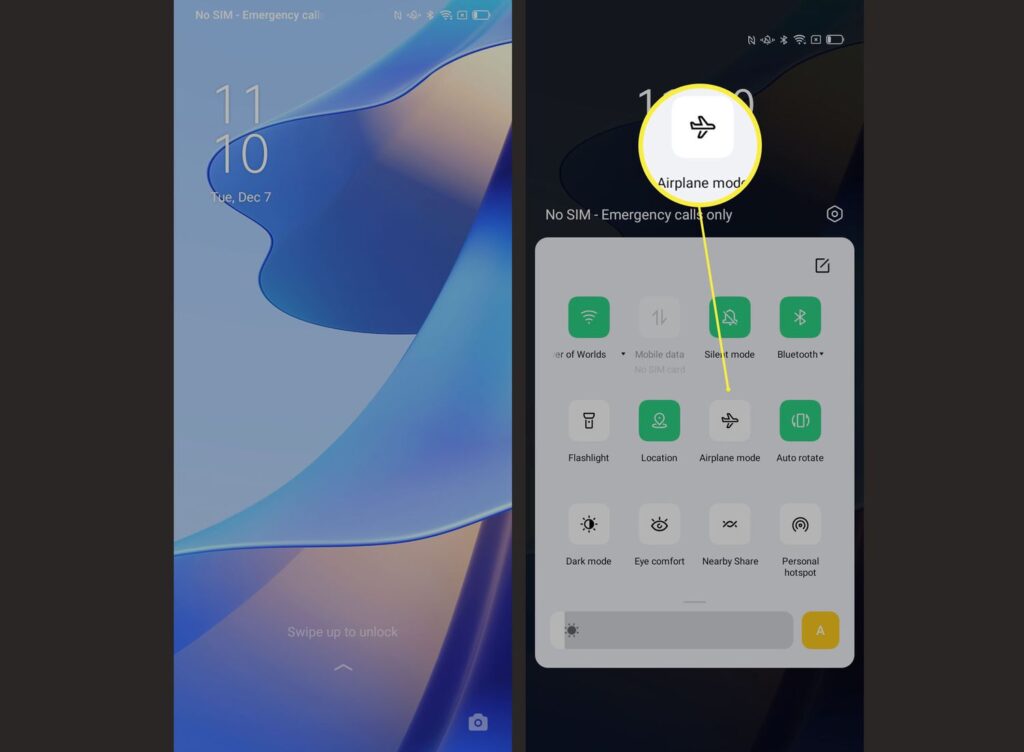
Occasionally, your iPhone may get stuck in Airplane Mode or have incorrect cellular settings, leading to the “SOS only” problem.
Action:
- Swipe down from the top-right corner of the screen to open Control Center.
- Ensure Airplane Mode is turned off (if it’s on, tap it to disable).
- Go to Settings > Cellular (or Mobile Data) and verify that Cellular Data is enabled.
-
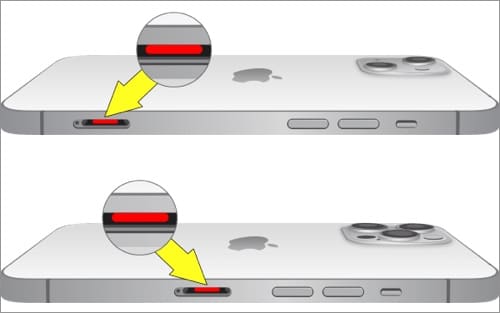
Reinsert SIM Card
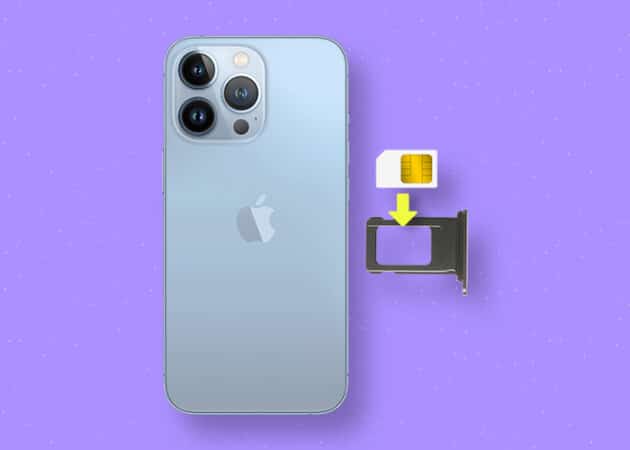
A loose or improperly inserted SIM card can also cause connectivity issues, including the “SOS only” signal.
Action:
- Eject the SIM card tray using the SIM ejector tool (or a paperclip).
- Carefully remove the SIM card, inspect it for any visible damage or debris, and reinsert it back into the tray.
- Insert the tray back into your iPhone securely.
-
Update Carrier Settings
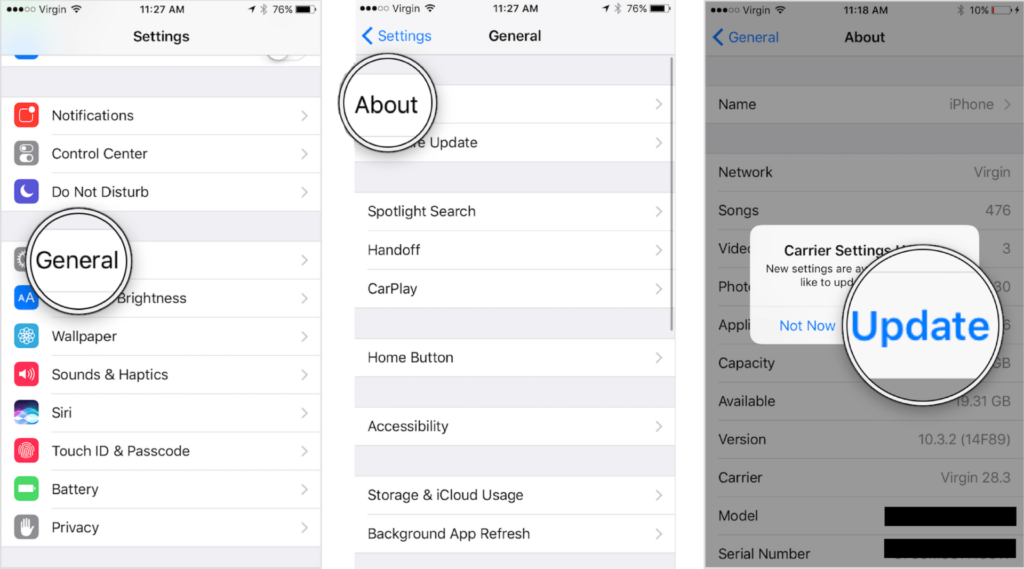
Carrier settings updates can sometimes resolve network-related issues, including the “SOS only” problem.
Action:
- Go to Settings > General > About.
- If an update is available, you’ll see a prompt to update your carrier settings. Follow the on-screen instructions to complete the update.
-
Check for iOS Updates

Software bugs can affect network connectivity, so keeping your iPhone’s operating system up to date is crucial.
Action:
- Go to Settings > General > Software Update.
- If an update is available, download and install it. Make sure your iPhone is connected to Wi-Fi and has sufficient battery life.
-
Reset Network Settings
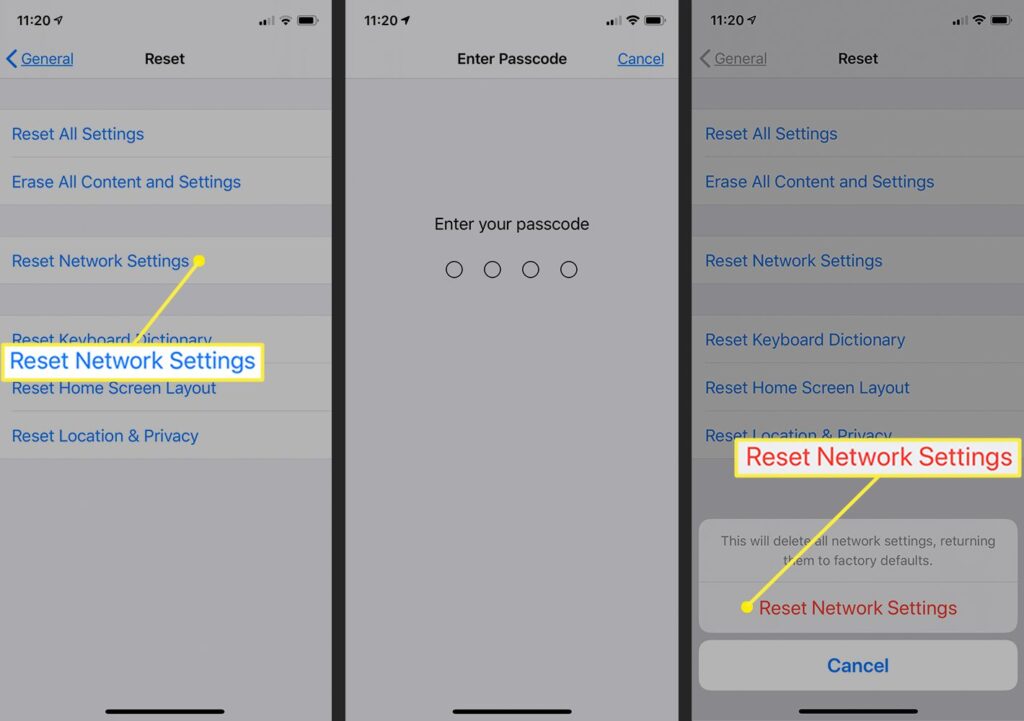
Resetting your iPhone’s network settings can often resolve persistent network issues, including the “SOS only” signal.
Action:
- Go to Settings > General > Reset.
- Tap “Reset Network Settings” and confirm your decision. Note that this will reset Wi-Fi networks and passwords, as well as cellular settings.
-
Check for Physical or Water Damage
Physical damage or exposure to water can affect your iPhone’s antenna or SIM card slot, leading to network connectivity issues.
Action:
- Inspect your iPhone for any signs of physical damage or exposure to water.
- If you suspect damage, contact Apple Support or visit an authorized service provider for further assistance.
-
Contact Your Carrier
If none of the above steps resolve the “SOS only” problem, it may be an issue with your carrier’s network.
Action:
- Contact your carrier’s customer support for assistance.
- They can check for network outages in your area or troubleshoot account-specific issues that may be causing the problem.
Conclusion
Dealing with an SOS only on iPhone how to fix the signal on your iPhone can be frustrating, but with the right approach and troubleshooting steps, you can often resolve the issue yourself. By following the steps outlined in this guide, you’ll be equipped to tackle network connectivity problems and get your iPhone back to its full functionality.
Remember, technology can be unpredictable at times, but armed with knowledge and patience, you can effectively troubleshoot and fix common issues like the “SOS only” problem on your iPhone. If you found this guide helpful, share it with others who might be facing similar challenges. Here’s to keeping your iPhone connected and running smoothly!
Note: If you continue to experience the “SOS only” issue despite trying all the solutions provided, it may indicate a hardware problem with your iPhone. In such cases, it’s best to seek professional assistance from Apple or an authorized service provider.
FAQs
What are the most common reasons for an iPhone to get stuck in SOS mode?
The most common reasons for an iPhone to get stuck in SOS mode are:
- Poor cellular coverage: The most common reason is that the iPhone is out of range of the cellular network, so it switches to “SOS Only” mode where it can only make emergency calls. This can happen when traveling to areas with poor signal coverage.
- Accidental button presses: Accidentally pressing the volume up, volume down, and power buttons simultaneously for a few seconds can trigger the Emergency SOS feature and put the iPhone in SOS mode.
- Software issues: Software glitches or bugs in the iPhone’s operating system can sometimes cause the device to get stuck in SOS mode, even when there is good cellular coverage.
- Network settings problems: Issues with the iPhone’s cellular network settings, such as incorrect carrier settings or problems with the SIM card, can lead to the device getting stuck in SOS mode.
- Jailbroken or modified iPhones: Attempts to bypass the iPhone’s built-in security measures, such as jailbreaking, can sometimes cause the device to get stuck in SOS mode.
The search results indicate that the most common and straightforward solutions are to check the cellular coverage, restart the iPhone, toggle airplane mode, and reset the network settings. Contacting the carrier or Apple support may be necessary if the issue persists.
How can I prevent my iPhone from entering SOS mode accidentally?
here are the key steps to prevent your iPhone from accidentally entering SOS mode:
-
Disable the Emergency SOS Shortcuts:
- Go to Settings > Emergency SOS
- Turn off the toggles for “Call with Hold and Release” and “Call with 5 Button Presses”
- This will disable the shortcut buttons that can trigger the Emergency SOS feature accidentally.
-
Review Emergency SOS Settings:
- In the Emergency SOS settings, make sure the “Call After Severe Crash” toggle is turned off if you don’t want your iPhone to automatically call emergency services in the event of a severe crash.
-
Be Careful with Button Presses:
- Avoid quickly pressing the volume up, volume down, and side buttons in quick succession, as this can trigger the Emergency SOS feature.
- Be mindful of how you handle your iPhone, especially if it’s in a case or mounted in a car, to prevent accidental button presses.
-
Update to the Latest iOS Version:
- Apple may address any software bugs or issues related to the Emergency SOS feature in newer iOS updates, so make sure your iPhone is running the latest version of iOS.
-
Contact Apple Support if Issues Persist:
- If you continue to experience problems with your iPhone accidentally entering SOS mode, reach out to Apple Support for further assistance.
By following these steps, you can help prevent your iPhone from accidentally triggering the Emergency SOS feature and avoid the frustration of being stuck in SOS mode. The key is to be mindful of your button presses and customize the Emergency SOS settings to suit your needs.
Can I customize the SOS mode activation buttons on my iPhone?
yes, you can customize the SOS mode activation buttons on your iPhone:
How to Customize iPhone SOS Settings
-
Disable Accidental Triggers:
- Go to Settings > Emergency SOS
- Turn off the toggles for “Call with Hold and Release” and “Call with 5 Button Presses”
- This will disable the shortcut buttons that can accidentally trigger the Emergency SOS feature.
-
Review Emergency SOS Settings:
- In the Emergency SOS settings, you can also turn off the “Call After Severe Crash” toggle if you don’t want your iPhone to automatically call emergency services in the event of a severe crash.
-
Customize SOS Activation:
- If you want to keep the Emergency SOS feature enabled, you can customize how it’s activated.
- For iPhone 8 or later, you can choose to either press and hold the side button and a volume button or rapidly press the side button 5 times.
- For iPhone 7 or earlier, you can only rapidly press the side (or top) button 5 times to activate SOS.
-
Disable Countdown Sound:
- In the Emergency SOS settings, you can choose to leave the countdown sound alert on or turn it off, depending on your preference.
By customizing these settings, you can prevent your iPhone from accidentally triggering the Emergency SOS feature, while still having the option to use it in a true emergency situation. This helps avoid the frustration of unintended emergency calls.