In the world of creativity and crafting, DIY craft boxes have become a popular choice for both kids and adults alike. These customizable boxes allow you to indulge in various crafts, from paper gift box craft to intricate projects using different materials. If you’re looking to create your own DIY craft box, this article will tell you through the process step-by-step, offering practical tips, inspiring ideas, and insights into crafting for all ages.
Understanding DIY Craft Boxes
DIY craft boxes are essentially kits or sets that contain materials and instructions for completing specific craft projects. They can range from simple paper gift box craft to more complex projects involving painting, sewing, or woodworking. These boxes are designed to make crafting accessible and enjoyable, providing everything you need in one convenient package.
Benefits of DIY Craft Boxes
- Convenience: All necessary materials are included, saving you time and effort in sourcing supplies.
- Creativity: Encourages creativity and exploration of different crafting techniques and materials.
- Education: Great for learning new skills and honing existing ones in a fun and engaging way.
How to Create Your Own DIY Craft Box
Creating your own DIY craft box allows you to tailor the contents to your preferences and interests. Whether you’re making it for yourself, your kids, or as a thoughtful gift, follow these steps to get started:
Step 1: Choose a Theme or Project
Decide on the theme or type of projects you want to include in your DIY craft box. Some popular ideas include:

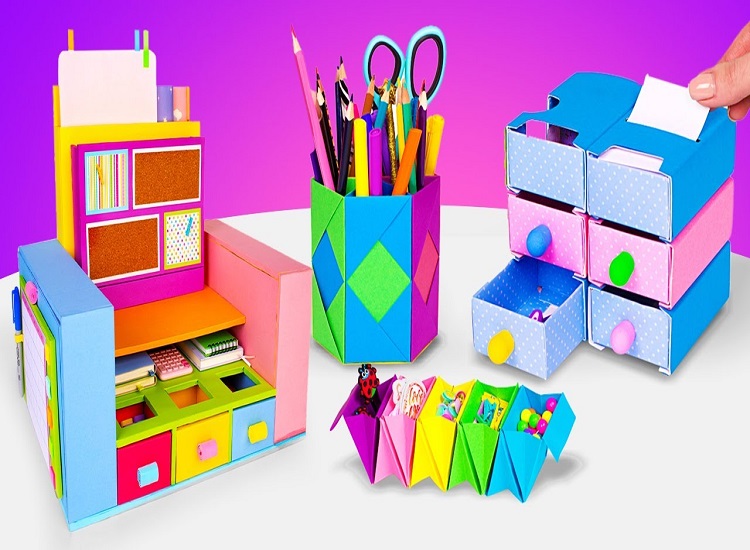
- Paper Gift Box Craft: Create decorative and functional gift boxes using various types of paper.
- DIY Craft Box for Kids: Include age-appropriate crafts such as painting, coloring, or simple jewelry making.
- DIY Craft Box for Adults: Incorporate more intricate projects like knitting, candle making, or leather crafting.
Step 2: Gather Materials and Supplies
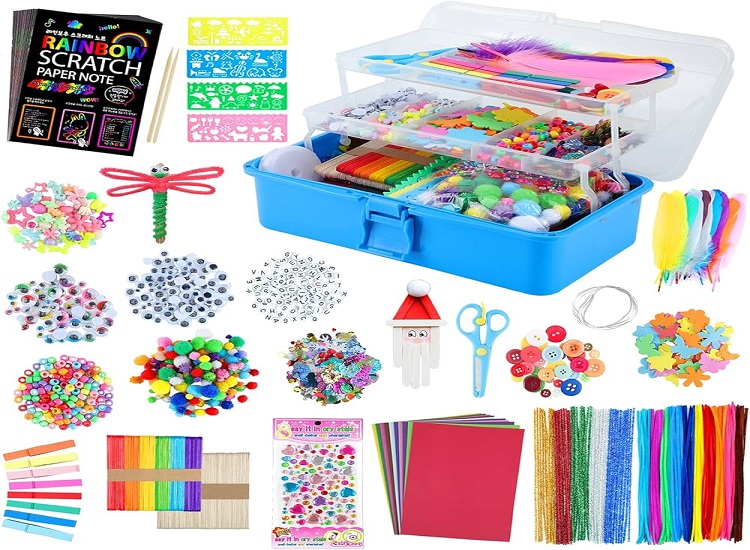
Based on your chosen theme, gather all the necessary materials and supplies. This may include:

- Paper (for paper crafts)
- Scissors, glue, tape
- Markers, crayons, paints
- Embellishments (e.g., stickers, ribbons)
- Instruction sheets or project ideas
Step 3: Organize and Package
Organize the materials neatly inside a box or container. Consider labeling each item or project kit for easy identification. Use dividers or compartments to keep small items organized.
Step 4: Include Instructions or Guides
Provide clear instructions or guides for each project included in the DIY craft box. This ensures that users, whether kids or adults, can easily follow along and complete the crafts successfully.
Step 5: Personalize and Decorate
Add a personal touch by decorating the outside of the box. Use stickers, stencils, or paint to customize the box and make it visually appealing.
DIY Craft Box Ideas
Here are some popular DIY craft box ideas to inspire your creativity:
- Seasonal Crafts: Create themed crafts for holidays or seasons, such as Halloween decorations or springtime flower crafts.
- Crafts for Special Occasions: Make personalized gifts like handmade cards or photo frames.
- Educational Crafts: Include STEM projects or activities that promote learning through hands-on experience.
- Crafts for Relaxation: Design craft boxes focused on activities like adult coloring or DIY spa products.
Benefits: Why DIY Craft Boxes are a Game-Changer
So, what makes DIY craft boxes so special? Here are just a few benefits:
- Customization: With a DIY craft box, you can customize it to fit your unique needs and style.
- Cost-effective: Making your own DIY craft box is a cost-effective way to get the storage you need without breaking the bank.
- Creative expression: A DIY craft box is a great way to express your creativity and showcase your personality.
Conclusion
In conclusion, making your own DIY craft box is a fun and creative way to get the storage you need without breaking the bank. With just a few simple materials, you can create a custom craft box that’s tailored to your unique needs and style. So, what are you waiting for? Get creative and make your own DIY craft box today!
By following the steps outlined in this guide and exploring different DIY craft box ideas, you can embark on a journey of creative exploration and discovery. Encourage creativity, inspire imagination, and enjoy the satisfaction of crafting something unique with your own DIY craft box.
FAQs
- What materials do I need to create a DIY Craft Box?
You’ll need a suitable container (cardboard box, plastic container, or wooden crate), dividers or small containers for organizing your supplies, and decorative materials like washi tape or stickers. - How do I decide what to include in my DIY Craft Box?
Sort your supplies into categories based on the type of crafting you enjoy. Include essential tools and materials, as well as items that inspire you, such as magazines or inspirational quotes. - Can I use a DIY Craft Box for specific types of crafting?
Absolutely! You can create a DIY Craft Box tailored to your preferred crafting medium, such as paper crafting, sewing, or painting. Customize the contents to suit your specific needs and interests. - How often should I update my DIY Craft Box?
Update your DIY Craft Box as needed, adding new supplies or removing unused items. Regularly reviewing and refreshing your box can help keep your crafting inspiration alive and your supplies organized. - Can I use a DIY Craft Box as a gift?
Yes! A DIY Craft Box can make a thoughtful and unique gift for the crafter in your life. Customize it with their favorite materials and include a handwritten note expressing your appreciation for their creativity.

